
The VIDE GUI-builder allows to define graphical user-interfaces for VIDE programs interactively. Since the GUI is based on the Java Runtime Environment, the GUI can be started on all platforms supported by Java (for example Windows, Linux, Apple OS X, Sun Solaris). The GUI can be started as a desktop-application or can be embedded as an Java applet in a web-site. Since the GUI communicates with the VIDE application with web-services, it's possible to create a distributed solution.
The VIDE GUI-builder is integrated in the VIDE-Eclipse-framework. Therefore, the GUI for a VIDE application can be designed without leaving the VIDE development environment.
The graphical user interface for a VIDE program allows the end-user to interact with the VIDE-program. Another use case for the VIDE-GUI is the testing while development. Graphical user interfaces allow are more efficient testing of an application and also the presentation of results to other developers. Since the graphical user interface can be designed without a running back-end application, it can be used to present and discuss the user-interface with the customer of the application during development.
The following tutorial consists of two parts: in the first part, we show how a simple „Hello-World“-application is created and published as a Java Applet, which can be started in a web-browser. In the second part we show a more complex application, which uses web-services to communicate with the VIDE server.
The first step is to create a new project. This can be done with the menu entry "File -> New -> Project".
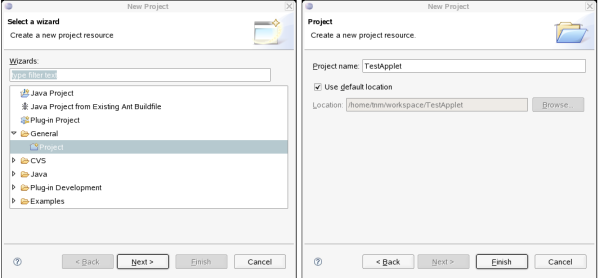
Figure 99: Definition of a new project
The next step is to create a new empty wfg-file (WebFace Graphic) which stores the GUI. This can be done with „New-> Other->TNMWebFaceWizard->TNMWebFace New Applet“.
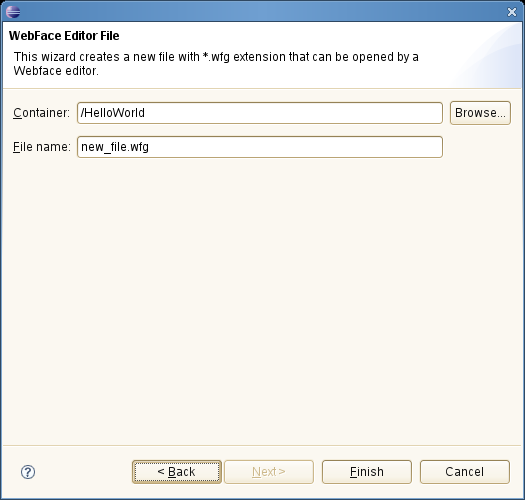
Figure 100: New Applet Wizard
A new GUI is created and displayed in the WebFace window. The menu items, panels and other elements of the WebFace menu is described in the reference manual.
In this first example, we want to define a simple GUI with a button and a text-field. When an user clicks the button, the text field should be cleared, In order to create this application, we put the two components on the panel of the application:
A button for starting the action
A text-field for some text-input
This is accomplished with the operation TNM:WebFace->Add Component. Choose the components from the list of available components (Button, Textfield) and place the components on the user interface. The size and position of the components can be changed with the mouse. The properties (for example colours, text, tool-tips) can be defined with the component editors (select component with the mouse and choose TNM:WebFace -> Edit Component).
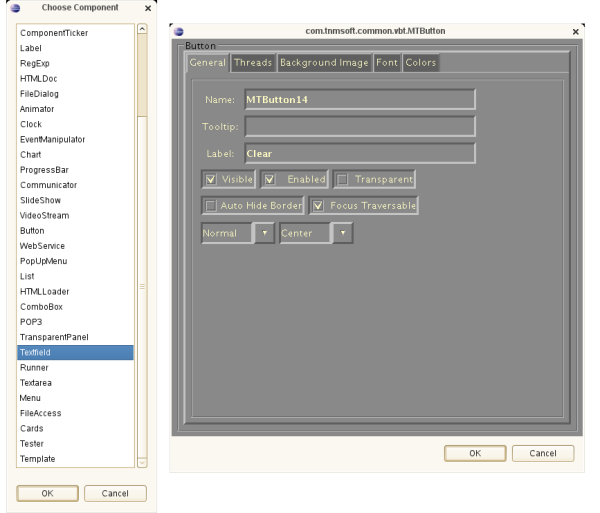
Figure 101: Choose a new component and edit the component with the component editor
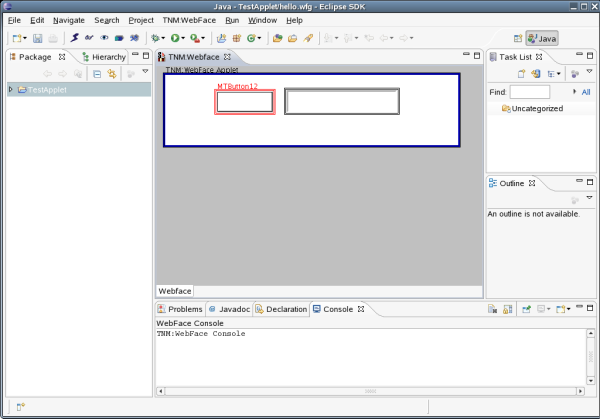
Figure 102: The new GUI with the two components
Now we want to connect the two components: if the button is clicked, the textfield should be cleared. In order to accomplish this function, select the menu item "Events" of the TNM:WebFace menu (or use the equivalent button of the toolbar). Select first the button and then the textfield. A dialog is opened which shows the event connections between the two components (from the button to the textfield). In the left column there are the events of the button, the right column shows the events of the textfield.
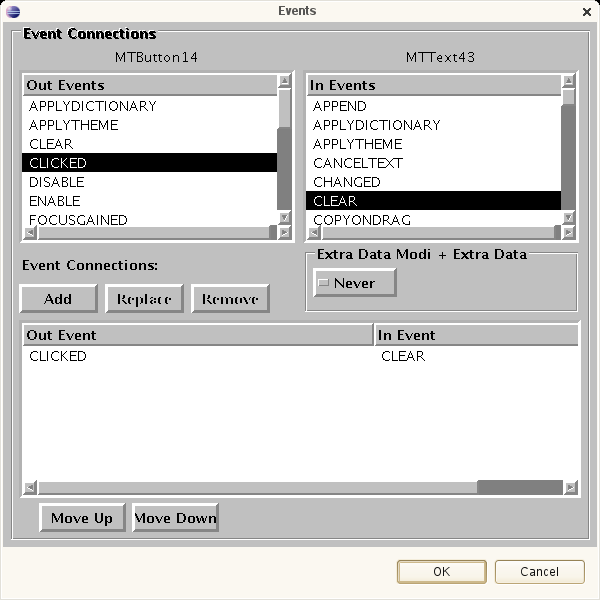
Figure 103: The dialog for the definition of the logical connections (events) between components
Select "CLICK" of the button's events and "CLEAR" of the events of the textfield and add this connection with the "Add"-button. Accept the data with "OK".
Now the simple „Hello- World“-application is ready. If you click on the button, the textfield is cleared.
The new event connection between the two components can also be visible with the event visualizer which is available as the second „card“ of the editor. A click on the connection shows a list of all events between the two components.
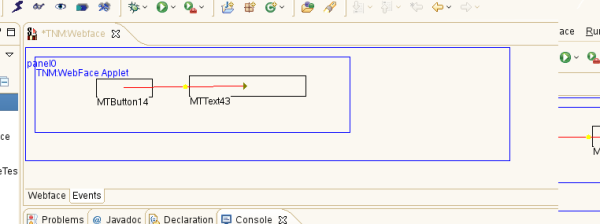
Figure 104: Event Visualizer
The new GUI can now be saved with the appropriate button.
Now we want to publish the application as a Java applet which can be used in a web-bowser. Create a new empty directory (outside of eclipse) for the applet. Create in the new directory a new file hello.wfp. In this file the template for the HTML-file of the applet is defined. For this example, you can use the follwing content:
# WebFace Publish-Definition
# name of file without extension
basename=hello
# Definition of template for web-page (if not present: do not generate web-page)
web.0=<html><head><title>Hello World</title></head><body bgcolor="$$<bgcolor>">
web.1=<applet code="com.tnmsoft.common.awt.MApplet.class" archive="$$<jar>" width="$$<width>" height="$$<height>">
web.2=<param name="info" value="VIDE">
web.3=<param name="content" value="$$<conf>">
web.4=<center> Sorry: You does not have Java-support activated. Please use a browser with Java-support</center>
web.5=</applet>
web.6=</body></html>
In Eclipse start the publish process with the menu item TNM:WebFace -> Publish. Choose the created file hello.wfp. After the publishing, the files needed for the applet (.html, .conf and .jar-files) are available in the directory. A web-browser with Java-support can be used to open the file hello.html and the application starts.
In this example we want to show how an GUI can be connected with complex server logic. The example is taken from our opportunity-demo. While the definition of the graphical components is done as in the previous example, we now use some logic (invisible) components. In order to make the logic components visible, a special view is used which can be started with „Window -> Show View -> Other -> Show Component View“.

Figure 105: The Opportunity Demo GUI with the component view
In general, the flow of information of a GUI with a web-service connection is as follows when the web-service should be called:
Collect the needed data from the GUI elements (visible and invisible)
Store the data in a memory component (keys should have the form param.0, param,1,param.2,...). The contents of this memory is the input for the web-service.
Call the web-service using the webservice component. The web-service component calls the operation of a web-service with the given parameters of the input memory. The result of the operation is also stored in result memory.
Fetch the result of the operation from the result memory and put the data in the fields of the GUI.
The web-service component can import a WSDL of a web-service. In order to configure the web-service component, start the editor of the component:
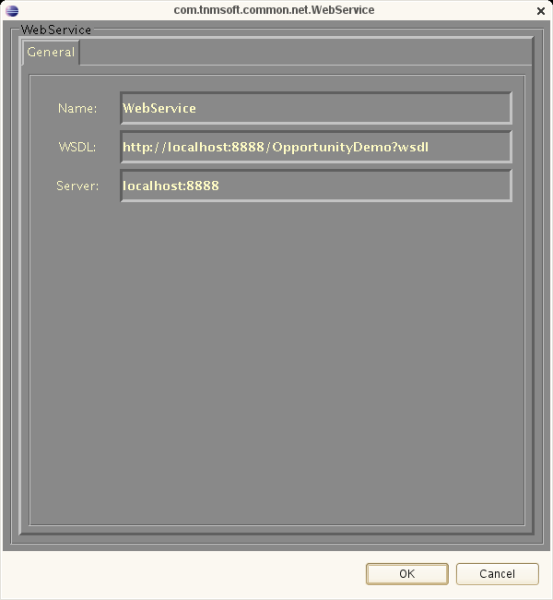
Figure 106: The editor of the web-service component
WebFace needs the WSDL and also the server. With these data, Webface can import and analyze the WSDL-file and generates the needed data. As a result you can find for every operation defined in the WSDL an event in the event-list of the web-service component. Each name of an event has the form CALLWS_operationname. If such an event is called with an input memory (a memory with keys param.0,param.1,...), WebFace converts automatically the input data in the needed data types for the web-service (see below) , calls the web-service and stores the result in the result memory.
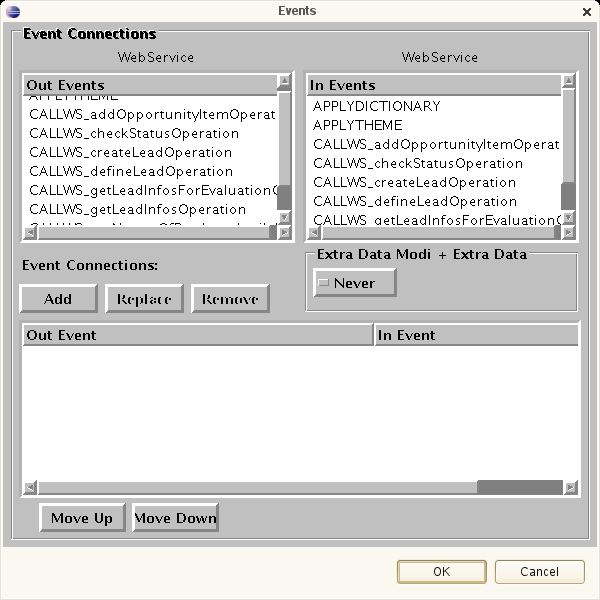
Figure 107: Generated events in the event-list of the web-service component
In the current version, the following data-types are supported for the paramters of a web-service:_ string, integer, float, double,string[], integer[], float[], double[].
In order to convert complex data-type like objects or array of objects to a component structure which can be used inside the GUI (for example in order to visualize an array of objects as a list), the web-service component can convert the result data of the web.service using a template. As an example we use an object with the access-methods getName,getID,getPName. In this example we assume, that the web-service returns an array of these objects and we want to visualize these objects as a list component in the GUI. We define the following template (with the line-breaks):
$$<getName>
$$<getID>
$$<getPName>
If this template is registered at the web-service component with the event „SETMAPTEMPLATE“,
the web-service component applies this template to each object of the result-array. The resulting string can be used directly to visualize the result of the operation in a list component (the list component uses a string of the data with line-breaks as delimiters).